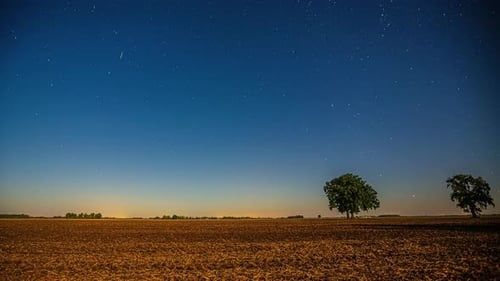
Starry twilight sky over a dark, open plowed field with two trees

Pastoral Astronomy: How to Read the Night Sky Across Quiet Open Acreage

Embracing the Quiet Wonder of Open Skies

Stepping into an unlit country paddock after sunset can feel like crossing a gentle threshold. The last sounds of the day settle into the grass, fence lines become soft silhouettes, and the sky opens without the bright interruptions familiar from towns and cities. On quiet acreage, even an ordinary evening can offer a fine view of the Moon, familiar stars, wandering planets, or a brief meteor passing overhead.

Pastoral stargazing asks very little of you. A warm blanket, a sheltered patch of meadow, and an unobstructed horizon are enough to begin. The pleasure lies in slowing down rather than collecting observations. Leave the phone indoors or keep it switched off, allow the eyes to grow accustomed to the dark, and let the evening unfold at its own unhurried pace. For guests at a rural lodge or countryside retreat, this simple ritual can become one of the most restorative parts of a stay.

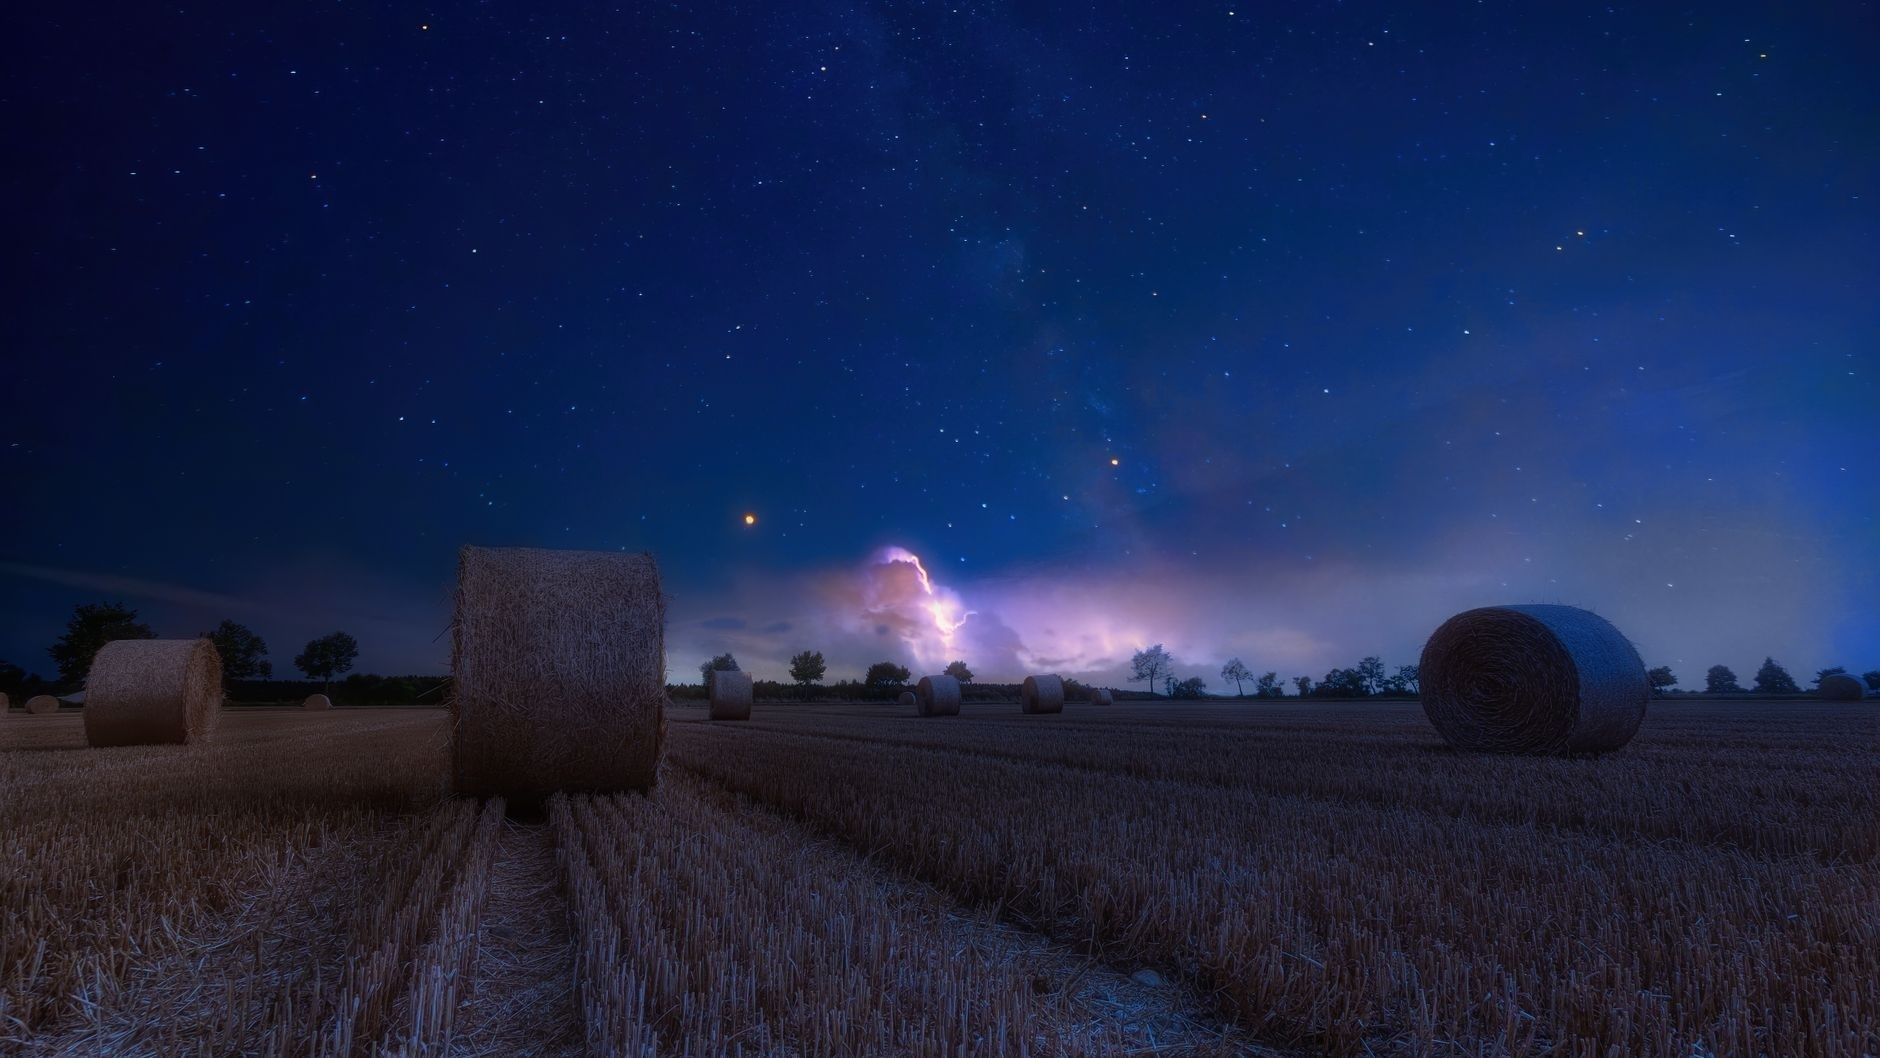
Star-filled sky and lightning over hay bales in a dark rural field
Far from urban glare, a quiet rural setting gives the eyes time to adjust and reveals the layered detail of the night sky.

Cultivating Natural Dark Adaptation in the Countryside

The night sky does not reveal all its detail at once. When you first leave a lit room, the eyes are still relying heavily on cone cells, which support color and sharp vision in brighter conditions. Over approximately twenty to thirty minutes in darkness, rod cells become increasingly important. Rods are more sensitive to faint light, allowing dim stars and subtle stretches of the Milky Way to emerge gradually. The change can be surprisingly noticeable: a patch of sky that seemed empty at first may begin to show layers of stars.

Artificial light is the main obstacle to this adjustment. Before settling outside, ask that porch lamps, stable lights, pathway fixtures, and nearby indoor lighting be switched off or shielded where practical. A small red light is preferable to a bright white flashlight because it is less disruptive to night vision. Keep the beam directed toward the ground, use the lowest useful brightness, and avoid looking directly into another person”s lamp. National Park Service astronomy guidance explains how allowing the eyes to adjust naturally helps observers notice faint celestial details without artificial aids.

  • Give the eyes at least twenty minutes, and ideally closer to thirty minutes, before judging the quality of the sky.
  • Choose a position away from porch illumination, vehicle headlights, and bright windows.
  • Use a dim red light only when necessary, keeping it covered or pointed down.
  • Bring layered quilts, wool throws, and a reclining lounger so comfort does not interrupt observation.
  • Keep a warm drink nearby, since stillness becomes much easier when hands and feet remain warm.

Comfort matters more than many first-time observers expect. A reclining lounger reduces neck strain and makes it easier to scan the sky slowly, while layered quilts allow you to adjust as the temperature falls. In horse-country settings, choose a firm, dry spot well clear of fences, gates, water troughs, and areas used by livestock. The safest and most restful vantage point is one agreed with the property team, especially where paddocks remain occupied after dark.

Learning to Read Celestial Motion Across the Horizon

One of the most satisfying early skills is learning to distinguish what moves steadily from what merely appears to move. Planets generally shine with a steady light because they are comparatively bright discs in the sky, even though atmospheric turbulence can occasionally affect their appearance. Stars are much farther away and appear as points of light, so they commonly twinkle more noticeably. Bright planets may be visible near the horizon after sunset or before sunrise, but their exact visibility depends on the date, location, and position of the Moon.

Satellites provide another quiet spectacle. A high-altitude satellite can look like a star gliding smoothly across the sky without blinking. The International Space Station may appear especially bright when conditions are suitable, but its visibility is time-sensitive, so current predictions should be checked before heading outside. Passenger aircraft behave differently. Their navigation lights blink in recognizable intervals, and their movement may seem slower or more irregular as they approach or recede. Meteors are the briefest visitors, appearing as sudden streaks that vanish within moments.

What you notice Light quality Likely explanation
Bright point that holds a steady glow Little or no twinkling Often a planet
Point of light moving smoothly across the sky Steady, unblinking light Likely a satellite
Moving light with repeated flashes Regular blinking pattern Passenger aircraft
Fast line that disappears almost immediately Brief, sharp streak Meteor
Stationary point with lively flicker Noticeable twinkle Distant star

Observation becomes easier when the gaze is relaxed rather than fixed intensely on one point. Look slightly to the side of a faint object instead of directly at it; this technique, known as averted vision, places the light on a more sensitive part of the retina. Binoculars are not essential, but a wide-angle pair can add detail to the Moon, star clusters, and the Milky Way while preserving a broad sense of the sky. A short session with the unaided eye is often the best beginning, since it teaches the overall rhythm of the heavens before equipment narrows the view.

Tracing Seasonal Constellations with the Naked Eye

Constellations become easier to learn when treated as landmarks rather than tests of memory. In the Northern Hemisphere, the Big Dipper is a useful starting pattern within Ursa Major. Its two outer bowl stars point toward Polaris, the North Star, which lies in the handle of the smaller Little Dipper and appears close to true north. Because Ursa Major, Ursa Minor, and Cassiopeia are circumpolar in much of the Northern Hemisphere, they can remain visible throughout the year, although their orientation changes as the night progresses.

Seasonal patterns provide a natural reason to return to the same pasture several times during a rural stay or across different visits. In summer, the Summer Triangle links Deneb in Cygnus, Vega in Lyra, and Altair in Aquila. Autumn brings prominent forms such as Cassiopeia”s distinctive W, Pegasus, and Andromeda. Winter is marked by Orion”s Belt, the bright stars of Orion, Taurus, and Canis Major. Spring offers Leo”s sickle, Virgo, and the broad Spring Triangle formed by Regulus, Spica, and Arcturus. These patterns are large enough to recognize without magnification once the eye has learned their basic shapes.

  • Begin with one bright landmark, such as the Big Dipper, Orion, or the Summer Triangle.
  • Trace the lines between its brightest stars with a finger or a dim red pointer, without staring into the light.
  • Use a printed chart viewed briefly under red light rather than leaving a bright phone screen on.
  • Return to the same landmark on later evenings and notice how its position changes.
  • Remember that an asterism is a recognizable pattern, while an official constellation covers a defined region of the sky.

Learning can be pleasantly low-tech. Draw a rough horizon line on paper and mark only the brightest stars, then add neighboring patterns during a later session. Ask each person in the group to describe a shape in ordinary language, such as a kite, saucepan, or hunter”s belt. Educational activities from NOIRLab”s stargazing programs can help guests build this foundational skill while following seasonal changes across an open landscape. A printed planisphere or simple star chart is especially useful because it avoids the glare and distractions of a bright digital application.

Crafting the Perfect Pasture Blanket Setup

The ideal viewing place is not necessarily the highest point. A shallow, wind-sheltered hollow can be more comfortable than an exposed hill, provided the horizon remains open. Look for a dry meadow position away from perimeter lighting, parked vehicles, and active livestock areas. Fences can disappear in darkness, so never wander beyond an agreed path or approach animals simply to find a better view. A host, ranger, or property manager can identify a safe location that combines broad sky access with sensible boundaries.

Prepare for stillness as carefully as for a country picnic. A heavy wool blanket over an insulated ground layer keeps dampness from rising, while a second throw can be wrapped around shoulders. An insulated thermos of herbal tea adds warmth without requiring a return indoors. Wide-angle binoculars are a useful middle ground between unaided viewing and a telescope, offering a closer look at the Moon and star clusters without demanding technical setup. Check the weather and Moon phase beforehand, since cloud, high humidity, and a bright full Moon can greatly change what is visible.

  1. Confirm with the property team that the chosen meadow or paddock is safe and available after dark.
  2. Switch off or shield nearby lights, and place a dim red lamp where it can be found without sweeping across the group.
  3. Lay down an insulated ground layer, followed by a heavy blanket and one or two additional quilts.
  4. Set up reclining loungers or supportive cushions so the neck and shoulders can remain relaxed.
  5. Arrange tea, water, binoculars, a printed star chart, and warm clothing within easy reach.
  6. Spend the first half hour simply resting and allowing dark adaptation before beginning a deliberate sky survey.

The best arrangement feels almost effortless once prepared. Keep bags, shoes, and cables away from walking routes, and collect everything before leaving so no small item is lost in the grass. Avoid open flames unless the site has specifically approved them, and never leave a lantern unattended. A quiet blanket setup should preserve the character of the pasture, allowing the land, the animals, and the night sky to remain undisturbed.

Step Outside and Reconnect with the Timeless Meadow Canopy

Slow astronomy offers a rare form of rest because it has no demand for immediate achievement. The eye adjusts gradually, familiar patterns emerge, and the mind begins to measure time by the movement of stars rather than by notifications or schedules. During a countryside retreat, that change of pace can make an evening feel longer and more memorable, whether the view includes a brilliant planet, a meteor, or simply a few newly recognized constellations.

Tonight”s preparation can be wonderfully modest. Bring warmth, choose a safe open horizon, let the lights fall away, and give the darkness enough time to reveal itself. No expensive optical equipment is required. Patience, curiosity, and a comfortable pasture blanket are sufficient invitations to sit beneath the meadow canopy and notice how much the night has been offering all along.

Rustic sourdough loaves surrounded by flour in a country kitchen

Before Dawn in the Country Kitchen: The Science of Sourdough Hydration and Cold Fermentation

The Quiet Hours Before Sunrise in the Hearth Room

At 4:30 in the morning, a country inn kitchen has a particular kind of stillness. Beyond the windows, fields remain dark and the stables are quiet, while inside, the first warmth gathers around a cast iron range and a covered bowl of dough. There is the faint scent of wheat, the soft hiss of a kettle, and the promise that guests will soon find warm bread beside the first coffee service. For anyone planning a restful rural stay, the appeal of country inn hospitality often rests on precisely these unseen details, where thoughtful preparation turns an ordinary breakfast into a memorable welcome.

That calm does not come from rushing more efficiently at dawn. It comes from moving the demanding work into the evening, when the kitchen is unhurried and the dough can develop under controlled conditions. Hydration and cold fermentation are the two governing tools. Water determines how flour becomes a workable network of gluten, while temperature controls how quickly yeast, bacteria, and enzymes transform that network. Used together, they allow home bakers and professional inn kitchens to produce loaves with deep flavor, generous oven spring, and a schedule that leaves the morning for coffee, horses, gardens, and guests.

Balancing Water and Grain for Texture and Crumb

Baker”s hydration is calculated by weight, not by cups or other volume measures. The water mass is divided by the total flour mass and multiplied by 100. A dough made with 500 grams of flour and 375 grams of water therefore has 75 percent hydration. Starter flour and water should also be included when calculating the true percentage, particularly when a recipe contains a substantial levain. This simple ratio provides a useful map, but it is not a universal commandment. Flour variety, extraction rate, protein content, age, and milling method all affect how much water the dough can absorb.

A rural kitchen can make that difference especially noticeable. A damp summer kitchen and a dry, centrally heated winter pantry may produce different doughs from the same formula. Fresh stone-ground or whole-grain flour usually contains more bran and germ, both of which absorb water and interrupt gluten development. White bread flour often tolerates more water while remaining elastic. The dough should therefore be judged by its feel as well as its calculation. A properly hydrated dough becomes smoother and more extensible during mixing and folding. If it feels tight, tears quickly, or resists incorporation, it may need more water. If it spreads into a loose paste and refuses to hold shape, the issue may be excessive water, insufficient strengthening, or fermentation that has gone too far.

Hydration also sets a clear tradeoff between crumb openness and handling ease. Lower hydration generally produces a firmer dough, a more structured crumb, and shaping that is reassuring for beginners. Higher hydration can create a thinner crust and irregular, custard-like holes, but it demands stronger gluten development and more confident handling. Adding the final portion of water gradually, a method known as bassinage, can help the dough develop strength before it receives additional moisture.

Hydration range Useful character Best suited to
65 to 70 percent Firm, stable, easy to shape Everyday sandwich-style or breakfast loaves
70 to 76 percent Balanced extensibility and open crumb Classic country boules and inn-style hearth loaves
76 to 82 percent Very tender crumb with larger irregular pockets Experienced bakers using strong, absorbent flour

The Chemistry of Chilling When the Kitchen Goes Dark

Cold fermentation is not fermentation stopped, but fermentation placed in slow motion. Refrigeration sharply reduces the activity of the wild yeasts in a sourdough culture, including strains related to Saccharomyces cerevisiae. The lactic acid bacteria also slow, yet they continue shaping the dough”s flavor over time. Depending on the culture and conditions, their activity contributes gentle lactic acidity, sharper acetic notes, and a more layered wheat character. A useful practical explanation from bread cookery guidance is that dough may take roughly ten times longer to rise in a refrigerator than at room temperature, although the exact rate depends on dough temperature, inoculation, flour, and refrigerator performance.

This slowdown creates the generous preparation window that makes overnight baking so well suited to country lodging. After bulk fermentation and shaping in the evening, the banneton can go into the refrigerator while the kitchen closes. The dough continues to mature without requiring a midnight check or a pre-dawn kneading session. Enzymes also remain active. As they break down portions of complex starches into simpler sugars, those sugars become available for fermentation and later contribute to browning and caramelized crust flavor. The result is not merely sourness, but a fuller aroma that can include toasted grain, mild fruit, and roasted malt.

Three glass jars showing different stages of sourdough starter fermentation
Overnight fermentation turns careful evening preparation into a flexible morning routine, allowing flavor to deepen while the kitchen rests.
  • Begin with a lively starter and allow the dough some room-temperature fermentation before chilling.
  • Use cool water when slowing a dough that is already fermenting quickly, and warmer water when the culture needs a stronger start.
  • Watch dough volume and elasticity rather than relying on the clock alone.
  • Plan for roughly 12 to 24 hours of cold proofing, extending the time only when the dough remains structurally sound.

Cold timing is particularly helpful in a guesthouse setting because breakfast has a fixed social rhythm. The loaf can be shaped after dinner, chilled overnight, and baked while coffee brews and the dining room is prepared. A home baker can borrow the same rhythm. Evening preparation protects the morning from last-minute surprises, while the cold dough is often easier to score and more resistant to spreading.

Covered or Open Bannetons for Crisp Morning Crusts

Whether a banneton should be covered during cold proofing depends less on doctrine than on the refrigerator”s microclimate. An uncovered loaf slowly loses moisture from its surface, creating a thin, taut skin. That skin can make an intricate score easier because the blade meets a clean, slightly resistant surface rather than a soft, sticky one. In a quiet, humid refrigerator without a circulating fan, this controlled evaporation may be beneficial.

Many domestic refrigerators, however, use airflow that steadily dries exposed dough. Commercial walk-in units can be even more demanding, especially near fans or cooling panels. Excessive drying forms a thick shell that restricts expansion and may leave the baked loaf tight around the edges. A loose plastic bag, reusable cover, or lidded container creates a humid pocket without preventing the basket from supporting the dough. Before baking, a chilled loaf should feel firm and cool. A gentle finger press that springs back immediately suggests under-proofing, while a depression that remains can indicate over-proofing. Moderate resistance with a slow partial return is generally a more useful sign of readiness.

  • Leave the banneton open only in a still refrigerator where the surface does not dry rapidly.
  • Cover dough in fan-assisted or visibly dry refrigeration.
  • Dust with rice flour when sticking is a concern, since it absorbs little water and remains effective on the basket surface.
  • Inspect the dough skin for a fine, dry tautness rather than a leathery crust.

From Cold Larder to Roaring Hearth in Five Steps

A chilled loaf can move directly from the refrigerator to the oven. There is no general requirement to bring it back to room temperature, and warming it may soften the dough before scoring. The key is to have the baking environment fully prepared before the basket leaves cold storage.

  1. Preheat the baking vessel. Place a cast iron Dutch oven or baking stone in the oven at least one hour before baking. High heat saturates the vessel and gives the dough immediate bottom heat, which supports rapid expansion. Many country-style loaves begin around 450°F, with the exact temperature adjusted for flour, loaf size, and oven behavior.
  2. Invert the chilled dough. Turn the dough onto parchment, a peel, or another prepared surface in one confident movement. Avoid excessive handling, since the fragile gas structure developed during fermentation is part of the loaf”s final volume.
  3. Score with purpose. Hold the razor at approximately a 45-degree angle and make one decisive slash along the loaf”s expansion line. A shallow, clean cut opens into an attractive ear, while hesitant sawing can deflate the surface or create ragged tearing.
  4. Capture steam early. Bake in a covered Dutch oven, or introduce steam when using a stone. Moist heat delays crust setting, allowing the dough to expand before the exterior hardens. This is the central mechanical advantage behind dramatic oven spring.
  5. Finish uncovered. Remove the lid or vent the steam for the final portion of baking. The drier heat deepens the crust from golden to mahogany and creates the brittle crackle associated with a well-baked hearth loaf. Allow the bread to cool for at least an hour before slicing, so the crumb can set rather than compress.

Visual judgment remains important throughout the process. A properly fermented loaf should show volume, aeration, and enough tension to hold its shape. If it spreads dramatically when turned out, the dough may have been too wet, insufficiently strengthened, or over-fermented. If the crumb is dense and the score barely opens, the starter may have been weak, the bulk fermentation too short, or the refrigerator too cold too early. Keeping notes on flour, dough temperature, room temperature, and proofing length turns each bake into a useful refinement rather than a guess.

The rhythm also suits hospitality beautifully. While the covered loaf expands in its own captured cloud of steam, the kitchen can turn to simpler tasks: slicing fruit, setting butter in a crock, warming cups, and opening the curtains toward the pasture. The bread does not demand constant attention, yet it rewards careful planning with a centerpiece that feels generous and thoroughly local.

Bring the Calm of the Country Morning to Your Own Table

The most successful overnight sourdough schedule is an agreement between biology and daily life. Hydration is chosen according to the flour and the crumb desired, not according to a fashionable number. Fermentation is extended under refrigeration, where yeast activity slows, bacteria and enzymes continue developing flavor, and the baker gains a practical margin of time. Covered or uncovered proofing is selected according to the refrigerator”s humidity and airflow, while the final bake uses stored heat and retained steam to transform cool dough into a deeply colored, fragrant loaf.

For home bakers, the reward is a quieter morning rather than a more complicated one. Shape the dough when the house settles, protect it from drying, and let the refrigerator carry the schedule through the night. At sunrise, a cold loaf can go straight into a properly heated Dutch oven, emerging with a crackling crust and an open, tender interior. Served with farmhouse butter, preserves, and strong coffee, it brings the calm of a well-run country kitchen to any table, whether the view beyond the window is a stable yard, a hedgerow, or a familiar city street.

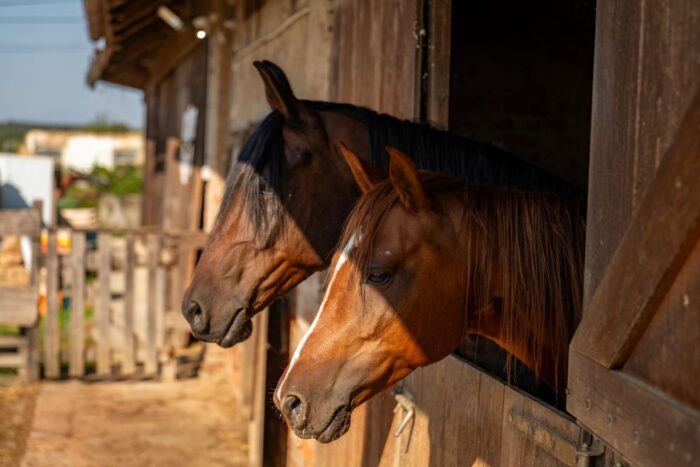
Two horses lean out from stalls in a sunlit barn aisle

Barn Etiquette for Guests: Navigating a Working Stable with Confidence

Embracing the Quiet Rhythm of Stable Life

Waking at a countryside equestrian bed and breakfast often brings a gentler kind of morning. Light settles across fields, boots rest by the door, and the first sounds may be the soft movement of horses, the creak of a stable door, or the measured footsteps of a barn hand beginning the day. For guests seeking a restorative rural escape, a working stable adds an atmosphere that feels both timeless and alive. The experience can be especially memorable when a stay combines comfortable rooms, open landscapes, and the calm presence of horses nearby.

A barn is both sanctuary and workplace, however, and its peaceful appearance can conceal a carefully coordinated routine. Horses need feeding, turnout, grooming, exercise, and health checks, often on a strict schedule. Enjoying this setting does not require riding experience or specialist knowledge. It requires observation, spatial awareness, and a willingness to follow local guidance. With a little courtesy and composure, you can move through the stable aisle confidently, share space with resident handlers, and appreciate the horses without interrupting the work that keeps them safe.

Understanding Barn Flow and Daily Farm Routines

Stable life follows a dependable cadence, although the details vary by property, season, weather, and the individual needs of each horse. Morning commonly begins with feeding and water checks, followed by turnouts into paddocks or fields. Staff may then muck stalls, refresh bedding, inspect equipment, groom horses, or prepare animals for exercise and lessons. Later in the day, horses may return from turnout, receive additional feed, and settle into their stalls before evening checks. Even a quiet-looking barn may therefore be a busy working environment.

The architecture of a stable is designed around safe movement. A broad central aisle may connect rows of stalls, while cross-ties provide a designated place for grooming or tacking up. Tack rooms contain saddles, bridles, blankets, and grooming tools, and feed rooms may hold grain, supplements, and other supplies. These areas are often private workspaces rather than visitor attractions. Ask before entering any room, opening a stall door, handling equipment, or crossing into an arena or paddock.

Hospitality in a barn is mostly a matter of timing and awareness. A friendly hello is welcome, but a handler leading a horse, carrying feed, or steering a wheelbarrow may need to concentrate. Step toward the side of the aisle, leave generous room, and wait for instructions rather than assuming that a horse will pass around you. If a wheelbarrow or cart is approaching, move clear without sudden gestures. Barn staff generally appreciate guests who are interested, polite, and attentive to directions.

  • Pause at the stable entrance and ask where guests may safely stand.
  • Keep central aisleways, stall fronts, gates, and doorways clear.
  • Never touch feed, tools, tack, or medication without permission.
  • Allow handlers to complete a task before starting a conversation.
  • Follow posted rules even when the barn appears quiet or unattended.

Decoding Equine Body Language at a Glance

Horses communicate continuously through posture, facial expression, ear position, muscle tension, and movement. The ASPCA”s horse body language guide explains that a relaxed horse may have soft eyes, relaxed facial muscles, a calm muzzle, and ears resting naturally or facing forward. A curious horse may lean toward something unfamiliar, stretch the neck, and investigate with forward ears. These signs do not guarantee that a horse wants to be touched, but they suggest a comparatively settled emotional state.

Signals calling for extra space should be taken seriously. A raised head, tense jaw, flared nostrils, exposed eye white, or ears directed sharply backward may indicate worry or defensiveness. The RSPCA”s guidance on equine behaviour also notes that a frightened horse may lean back or prepare to move away, while an angry horse may flatten its ears, turn its head, lunge, or threaten to bite. Avoid approaching from behind, particularly if the horse appears tense, because a kick can happen quickly and without much warning.

What you may notice Possible meaning Appropriate guest response
Soft eyes, loose posture, relaxed muzzle Relaxed or neutral Remain calm and ask before offering a touch
Forward ears, stretched neck, gentle investigation Curious and attentive Stand quietly and allow the horse to observe you
Raised head, tense muscles, uneven or backward ears Worried or alert Increase distance and let the handler manage the situation
Flattened ears, fixed stare, tightened mouth, turned head Defensive or angry Do not approach, touch, feed, or block the horse”s exit

Individual horses have individual personalities, so body language should always be interpreted in context. A horse resting with its head low and one hind leg relaxed may simply be dozing, while a horse that seems unusually withdrawn when awake may need attention from its regular carers. Guests do not need to diagnose behaviour. The useful habit is to notice changes, mention concerns to a host or handler, and avoid trying to solve the situation independently.

Human composure matters as well. Horses are highly attentive to movement, posture, and changes in energy. Slow breathing, relaxed shoulders, quiet footsteps, and smooth gestures are more reassuring than excited voices or hurried approaches. If a horse becomes alert, stop moving, give it room, and wait for staff guidance. Calmness is not a performance. It is simply the safest and most respectful way to share the space.

Mindful Approaches to Stall Doors and Pasture Fences

A stall front or pasture fence can feel like an inviting place to meet a horse, but every interaction should begin with permission. The horse may be sleeping, eating, recovering, or receiving training instructions. Some horses enjoy quiet contact, while others prefer to observe visitors from a distance. Hosts and barn managers know those distinctions and can tell you which animals are suitable for gentle interaction.

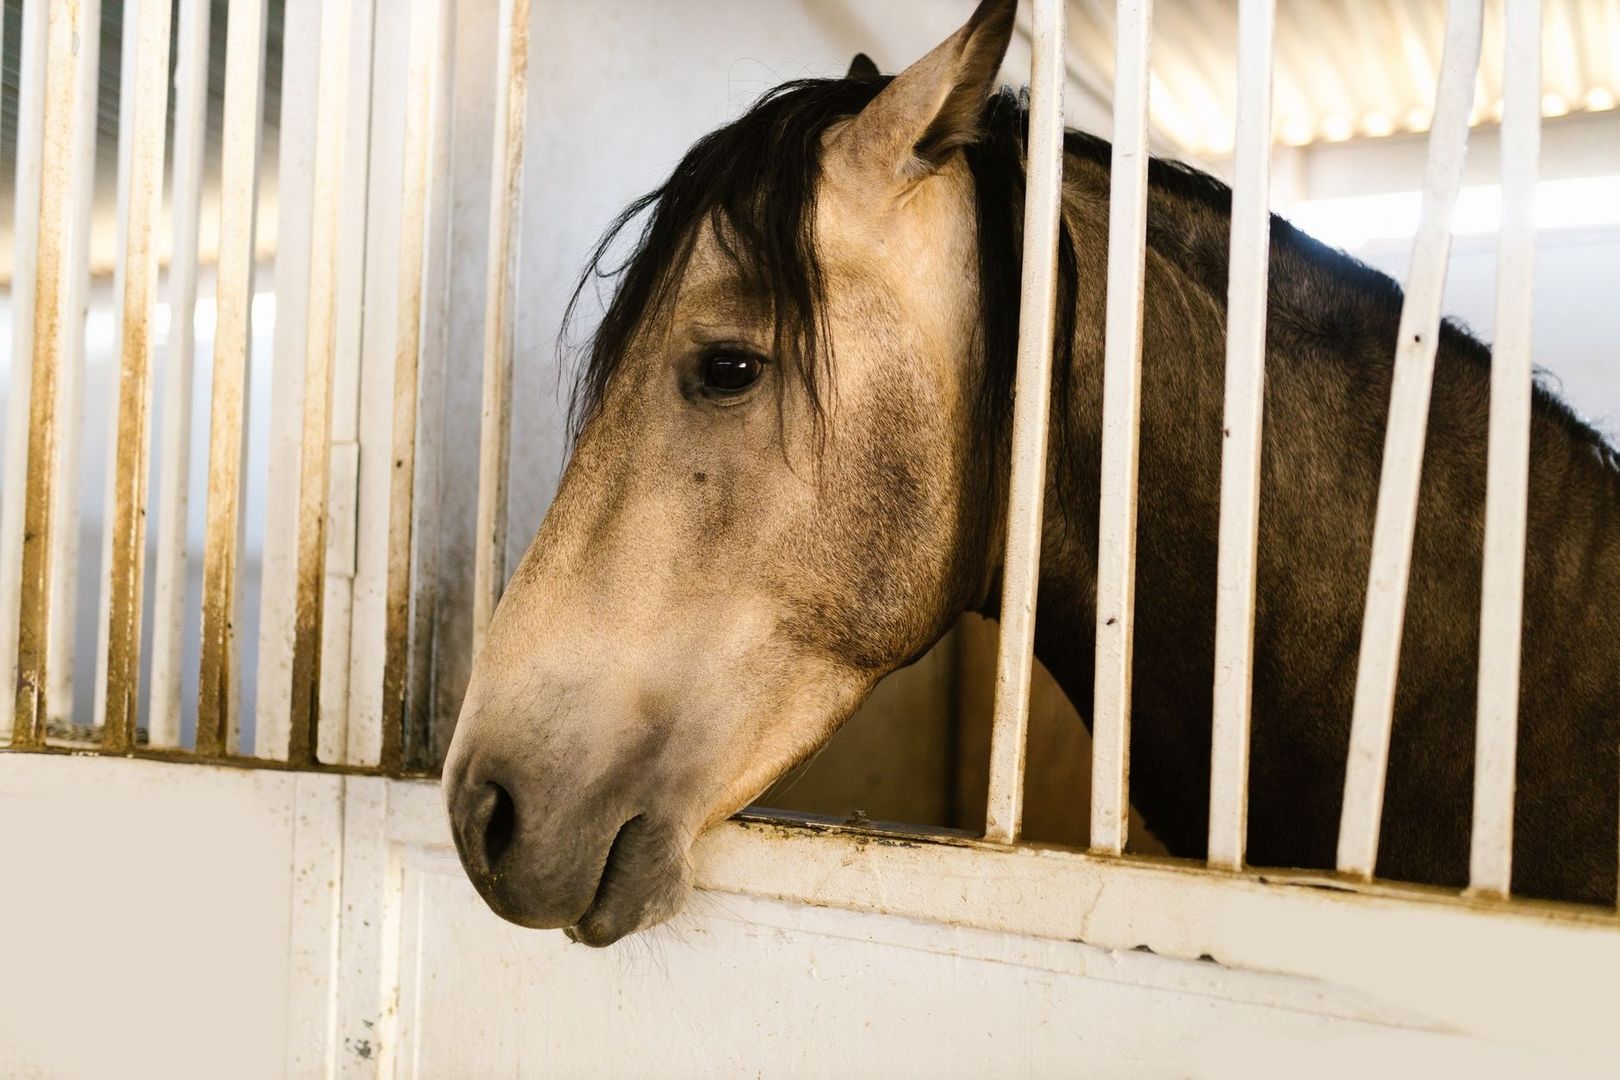
Horse looking through the bars of a stable stall door
A quiet pause at the stall gives both horse and guest time to assess one another before any interaction begins.
  1. Stop several feet away and observe the horse before approaching.
  2. Speak softly or use a gentle greeting so the horse knows where you are.
  3. Stand near the shoulder or side of the neck, never directly behind the hindquarters.
  4. Keep your movements slow and offer the back of your hand for the horse to investigate if a handler recommends it.
  5. Touch the shoulder or neck lightly rather than reaching straight toward the nose or face.
  6. Step away if the horse raises its head, tenses, pins its ears, backs away, or turns its hindquarters.

Food deserves particular caution. Treats, carrots, apples, and handfuls of feed may seem like a natural way to make friends, yet horses can have dietary restrictions, allergies, medication routines, or learned habits that make unscheduled feeding unsafe. Always coordinate treats through the bed-and-breakfast hosts or barn manager. Never offer food over a fence, through stall bars, or to a horse that is actively eating unless a responsible handler has specifically invited you to do so.

Pasture boundaries also require care. Never lean over electric fencing, climb through rails, or unlatch a gate without instruction. A horse may approach the fence quickly, and a gate can swing or become a dangerous pinch point. Keep hands, cameras, and loose clothing away from moving latches. If a gate must be opened, ask a staff member to demonstrate the correct procedure and make certain every horse is accounted for before passing through.

Sensory Etiquette for Rural Stays and Country Walks

Practical clothing makes a stable visit more comfortable without compromising a polished weekend wardrobe. Closed-toe, mud-ready footwear with secure soles is preferable to sandals, smooth fashion boots, or loose slippers. Choose fitted layers that will not catch on latches or fencing, and avoid dangling scarves, swinging handbags, and long accessories. A waterproof jacket, warm socks, and clothing suitable for changing weather can make the difference between a pleasant walk and an uncomfortable retreat indoors.

Sound and movement should be kept measured around horses, training arenas, and paddocks. Avoid shouting, running, sudden waving, and flash photography, especially when a horse is being ridden, loaded, groomed, or handled. Ask before taking close-up photographs of staff, riders, or animals, and respect requests to keep phones or cameras away. Properties differ in their visitor policies. For example, working public farms such as Ardenwood Historic Farm and Lake Metroparks Farmpark publish specific rules about animals, facilities, pets, and visitor activities, illustrating why checking local guidance matters.

  • Keep dogs leashed and well away from horses unless the property expressly permits otherwise.
  • Supervise children closely and teach them to walk, speak quietly, and ask before touching.
  • Stay on marked paths and never enter a paddock, arena, or field without permission.
  • Do not bring bicycles, scooters, drones, or other noisy equipment into stable areas unless approved.
  • Close gates and leave fences, signs, tools, and historic features exactly as found.

These simple choices preserve the atmosphere that makes a rural stay so appealing. A stable is not merely scenery for a photograph. It is a home for animals and a workplace for people, often connected to generations of agricultural and equestrian heritage. Quiet observation allows guests to notice the small details: the rhythm of hay being placed, the soft swish of a tail, the changing light across a paddock, and the unhurried precision of familiar chores.

Savoring Meaningful Moments in Countryside Stables

Thoughtful etiquette transforms a visit to a working stable from a passive sightseeing stop into a more meaningful countryside experience. By watching before approaching, leaving clear paths, following staff instructions, and respecting each horse”s personal space, guests can enjoy the atmosphere without adding pressure to the daily routine. The result is a stay that feels both comfortable and connected to the land.

Slow down and let the stable reveal itself at its own pace. Notice the gentle cadence of feeding, grooming, turnout, and evening checks, while appreciating the pastoral heritage that continues through ordinary work. With warmth, curiosity, and renewed confidence, you can step into the stable aisle knowing that considerate behaviour is the most valuable form of equestrian etiquette.